
← Back to Docs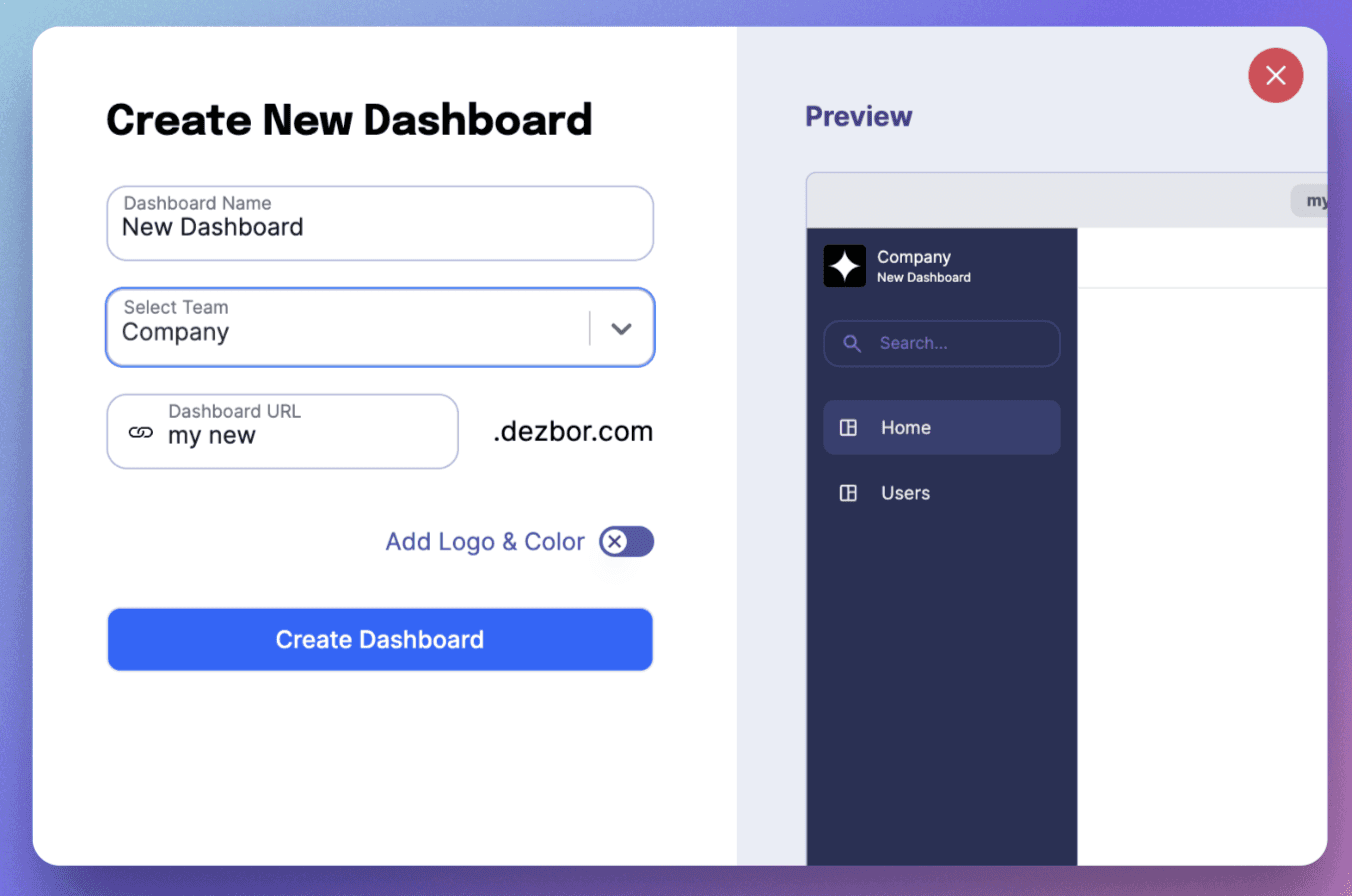
📈
Creating a Dashboard or Admin Panel without Code
Build Your Dashboard
Creating your own interactive, no-code dashboards in Dezbor is as easy as 1, 2, 3. Let's get started!
Creating a New Dashboard
- Start New: Navigate to Dezbor App's dashboard and click on 'Create New Dashboard.'
- Name Your Dashboard: A dialogue box will appear. Name your dashboard and decide which team it belongs to.
- Choose Layout: Choose a layout option. Dezbor's layouts effectively guide the general structure of your dashboard.
- Save: Once you've decided on the name and layout, click on 'Save.'
Adding Components
- Add Component: Click '+Add Component.' A menu will appear, showcasing different components — tables, charts, buttons, and forms.
- Drag and Drop: Simply drag and drop your desired component onto your dashboard.
- Configure Component: After adding a component, configure it by attaching data or adding logic.
- Customize Your Component: Customize each component using "Edit Mode." Change colors, sizes, positioning, and more.
Linking Database and Adding Logic
- Link Database: Connect your tables and charts to your databases or Google Sheets by using the QueryBuilder tool.
- Add Logic: For components like buttons and forms, add logic for interactive activities such as delete, insert, or update the data.
Preview and Publish
- Toggle View: Use the toggle switch at the top to switch between 'Edit Mode' and 'View Mode.'
- Publish: When you're happy with your dashboard, click 'Publish.' The dashboard will now be live.
Congratulations, you've just created your first no-code, AI-enhanced dashboard using Dezbor!